If you’ve been wondering how to propagate spider plants, you’re in the right place.
Spider plants (Chlorophytum comosum) are among the easiest and most rewarding houseplants to propagate, making them perfect for beginners and seasoned gardeners alike.
Their cascading spiderettes, or baby plants, make the process simple, and with just a bit of care, you’ll soon have a new generation of plants to enjoy or share.
Whether you're looking to expand your indoor jungle or gift a piece of greenery to a friend, propagating spider plants is a satisfying and straightforward endeavor.
Let’s dive into the step-by-step process to ensure your propagation journey is a success.

Step 1: Choose Healthy Spiderettes
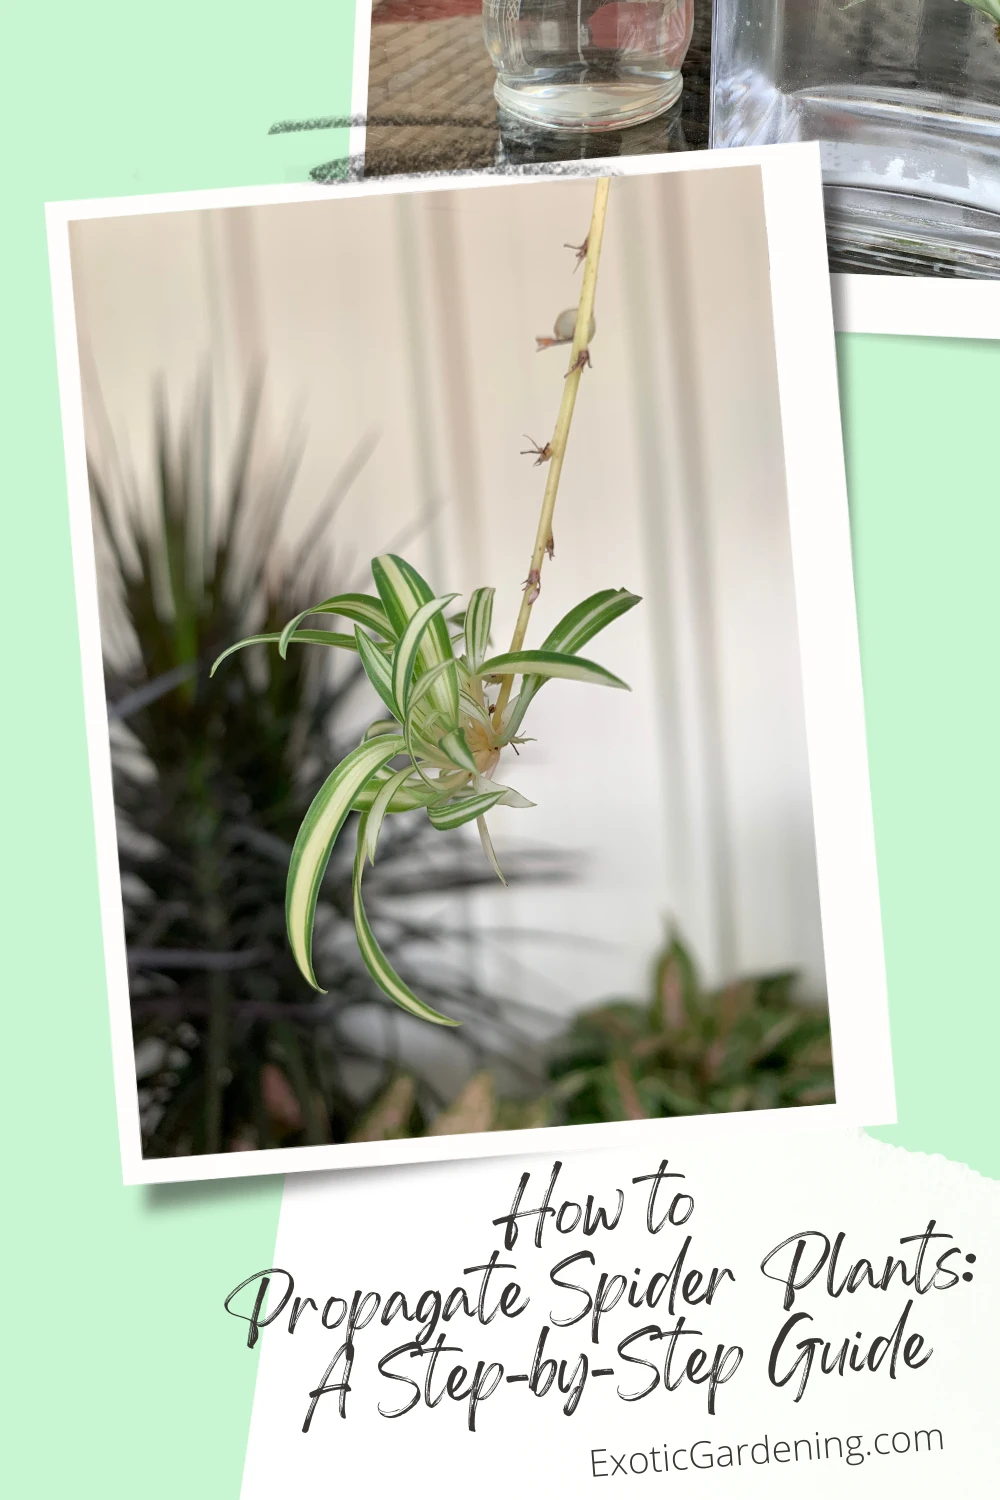
The first step in learning how to propagate spider plants is selecting the right spiderettes.
These are the small plantlets that dangle from the mother plant’s runners. For successful propagation:
- Look for well-developed spiderettes: Ensure the plantlet has small roots already forming. These roots often appear as tiny nubs at the base of the spiderette.
- Check for health: The spiderette should have vibrant green leaves and no signs of yellowing, browning, or damage.
- Size matters: Larger, more mature spiderettes have a better chance of thriving after propagation.
By starting with healthy spiderettes, you’re setting the stage for a strong new plant.
Step 2: Gather Your Tools
Before you start, it’s essential to have the right tools on hand.
Proper preparation ensures the process is smooth and reduces the risk of damage to the plant.
Here’s what you’ll need:
- Clean, sharp scissors or pruning shears: To make a clean cut and avoid crushing the runner stem.
- Small pots: For planting your spiderettes if you choose the soil method.
- Well-draining potting mix: A light mix with added perlite or sand is ideal.
- Water jars: If you opt for the water propagation method.
- Labels or markers: To track the propagation process (optional).
Step 3: Cut the Spiderette
Once you’ve selected a healthy spiderette, it’s time to make the cut:
- Locate the runner stem: The thin stem connecting the spiderette to the mother plant.
- Cut close to the base: Use your clean scissors or shears to snip the runner stem just below the spiderette. This minimizes stress on both the mother plant and the spiderette.
- Inspect the cut: Ensure it’s clean and free from fraying to promote healthy root growth.
Step 4: Choose Your Propagation Method
Spider plants are versatile and can be propagated in two primary ways: the water method or the soil method.
Both are effective, so choose the one that works best for you.
Water Propagation Method
The water method is ideal if you want to monitor root development closely:
- Prepare a jar of water: Fill a clean jar with room-temperature water. Avoid using hard water or water with added chemicals.
- Place the spiderette in the jar: Submerge the base of the plantlet—the part with the tiny roots—in the water. Ensure the leaves stay above the waterline to prevent rot.
- Change the water regularly: Refresh the water every few days to keep it clean and oxygenated.
- Wait for roots to grow: Within 1-2 weeks, you should see longer roots forming. Once the roots are about an inch long, it’s time to transfer the plantlet to soil.
Soil Propagation Method
For those who prefer a more direct approach, the soil method is an excellent option:
- Prepare the pot: Fill a small pot with well-draining potting mix. Lightly moisten the soil before planting.
- Plant the spiderette: Create a small hole in the soil and gently place the spiderette’s base into it, ensuring the tiny roots are covered.
- Firm the soil: Press the soil gently around the base of the spiderette to secure it in place.
- Water lightly: Avoid overwatering; the soil should be moist but not soggy.
Step 5: Provide the Right Light
Bright, indirect sunlight is essential for newly propagated spider plants.
Place your plantlets in a location where they’ll receive ample light without being exposed to direct sun, which can scorch their delicate leaves.
East- or north-facing windows are ideal.
If natural light is limited, consider using a grow light to support healthy growth.
Maintain a consistent light schedule of 10-12 hours per day for optimal results.
Step 6: Water Sparingly at First
Newly propagated spider plants need a careful watering routine:
- Avoid overwatering: The soil should be kept slightly moist but never soggy. Overwatering can lead to root rot, especially in young plants.
- Check for dryness: Allow the top inch of soil to dry out between waterings.
- Adjust as needed: Monitor your plantlet and adjust your watering schedule based on its growth and environmental conditions.
Tips & Troubleshooting
Even with the best care, you may encounter some challenges while propagating spider plants.
Here are common issues and how to address them:
Yellowing Leaves
- Cause: Overwatering or poor drainage.
- Solution: Reduce watering frequency and ensure the pot has proper drainage.
Slow Root Formation
- Cause: Insufficient light or poor-quality spiderettes.
- Solution: Move the plantlet to a brighter location or start with a healthier spiderette.
Rotting Plantlet
- Cause: Prolonged exposure to soggy soil or water.
- Solution: Use clean water for the water method and well-draining soil for the soil method.
Stunted Growth
- Cause: Nutrient deficiency.
- Solution: Once established, feed your spider plant with a diluted houseplant fertilizer every 4-6 weeks during the growing season.
Take the Guesswork Out of Growing Spider Plants!

Struggling to keep your spider plant looking lush and vibrant? Between figuring out when to water, how much sunlight it needs, and how to tackle pests, it’s easy to feel overwhelmed. That’s why I created the Spider Plant Care Planner—the perfect tool for plant lovers who want healthier, thriving plants without all the stress.
- Track watering schedules, sunlight exposure, and pest prevention.
- Get seasonal care tips specific to spider plants (yes, they have different needs in summer and winter!).
- Keep things organized with an easy-to-use format designed for busy lifestyles.
Whether you’re a beginner or a seasoned plant parent, this planner will help you grow beautiful spider plants with confidence. Plus, for a limited time, you can snag it at $3.00. Don’t miss out—your spider plant will thank you!
Track Your Propagation Progress
To ensure the best results, consider tracking your propagation journey.
Use our Spider Plant Care Planner, a handy printable tool to monitor root growth, watering schedules, and light exposure.
Staying organized makes it easier to identify and resolve any issues quickly.
Download your Spider Plant Care Planner here!
Cultivate Your Indoor Garden
Propagating spider plants is a simple yet rewarding process that brings the joy of nurturing new life into your home.
By following this step-by-step guide on how to propagate spider plants, you’ll be well on your way to creating a thriving collection of these charming houseplants.
Whether you choose the water method or soil method, remember that patience and proper care are key to success.
Linked Resources for Further Reading:
- How to Grow Spider Plants
- Top 10 Common Spider Plant Problems and How to Fix Them
- 10 Fascinating Facts About Spider Plants You Didn’t Know
- 5 Creative Spider Plant Display Ideas for Your Home
- Spider Plant Light Requirements: A Key to Growth
- 5 Fun DIY Projects With Spider Plants
Discover the Joy of Houseplants: Your Ultimate Resource Guide
Welcome to the ultimate guide for all things houseplants! Whether you’re a seasoned green thumb or just starting your indoor gardening journey, this curated list of articles has something for everyone. From detailed care instructions to creative decorating ideas, troubleshooting common issues, and learning about unique plant varieties, you’ll find everything you need to keep your indoor jungle thriving.
Explore topics like:
Essential care tips for popular houseplants.
Solutions to common problems like pests, watering mistakes, and lighting challenges.
Creative ways to display and style your plants.
Propagation guides to grow your collection.
Get inspired, troubleshoot challenges, and cultivate the lush, vibrant indoor space you’ve always dreamed of. Dive in and let your houseplants flourish with these helpful resources!
Mastering South-Facing Window Plants: Expert Tips for Your Lush Oasis
Discover the secrets of success with South-Facing Window Plants in our comprehensive guide. Transform your space into a green haven.
Transform Your Cozy Corner with these Perfect Plants for Small Spaces
Discover the beauty of compact gardening with our guide on choosing and caring for plants for small spaces.
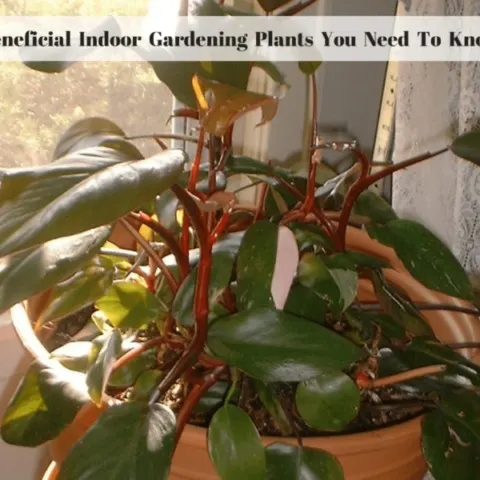
The Complete Guide to Philodendron Pink Princess Care
Introducing the Philodendron Pink Princess
Allow me to introduce you to the crown jewel of my botanical collection – the enchanting Philodendron Pink Princess.
This recent addition is nothing short of a horticultural masterpiece, captivating the senses with its breathtaking display of colors.
Imagine deep, luxurious burgundy leaves, each adorned with bold splashes of vivacious pink.
The contrast is nothing short of a visual symphony, a natural work of art that commands attention.
As I gazed upon it for the first time, I couldn't help but marvel at the sheer beauty and grace that this plant exudes.
If you've never had the pleasure of setting your eyes on a Philodendron Pink Princess, consider yourself in for a treat beyond compare.
It's more than a plant; it's a showstopper, a conversation piece, and a living testament to the wonders of the natural world.
This captivating botanical gem promises to be a source of endless fascination and admiration in any space it graces.
Spider Plants: The Perfect Gateway Plant for Gardening Enthusiasts
Spider plants, the perfect gateway plant, add charm, purify air, and are ideal for beginners and seasoned gardeners alike.
Spider Plant Light Requirements: A Key to Growth
Explore Spider Plant light requirements for thriving indoor growth. Learn key tips for optimal lighting conditions and vibrant greenery.
How to Grow Spider Plants
Discover how to grow spider plants with expert tips on light, watering, soil, and more for thriving plants!
5 Creative Spider Plant Display Ideas for Your Home
Discover creative spider plant display ideas to elevate your home decor with unique, stunning, and easy-to-implement solutions.
5 Fun DIY Projects with Spider Plants
Explore creative DIY projects with Spider Plants, including terrariums, macramé hangers, and upcycled planters for vibrant decor.
10 Fascinating Facts About Spider Plants You Didn’t Know
Discover fascinating facts about spider plants, including their care, propagation, and unique qualities that make them standout houseplants.
Top 10 Common Spider Plant Problems and How to Fix Them
Discover solutions to common spider plant problems like brown tips, yellow leaves, and droopy growth to keep them thriving.
Rustic Interior Decorating Idea With Tropical Plants
Metal cages or even old bird cages filled with plants are a great way to add a rustic touch to your interior decor.
Plumeria: The Lei Flower Is A Fragrant, Easy To Grow Houseplant
Learn how to care for your Plumeria in ground and in containers. Because of the winter dormancy period it is ideal for summer containers.
Indoor Flowering Tropical Plants
There are a number of indoor flowering tropical plants that are easy to care for and bloom all winter long under the right conditions.
How To Grow Boswellia sacra
Boswellia sacra is the plant frankincense tears comes from. Learn how to grow the Boswellia sacra plant and what the various uses for it are.
6 Easy Tips On How To Care For Plants
Proper plant maintenance is essential if you want to learn how to grow healthy plants. Check out these six tips on how to care for plants.
Beneficial Indoor Gardening Plants You Need To Know
Learn about indoor gardening beneficial plants that are edible, help heal minor cuts or burns or those that help remove impurities from the indoor air.
How To Choose The Right House Plants For Indoor Gardening
Choosing the right plants for an indoor gardening environment is important for success. Many indoor gardening house plants are easy to care for.
How To Care For Holiday Plants
Have you ever wondered how to care for holiday plants such as the Poinsettia or the Christmas Cactus? If so, then check out this holiday plant care guide
Understanding and Treating Plant Blight: The In-depth Guide
Master treating plant blight with expert tips. Learn to protect your garden from this common threat. Essential insights inside.
Fall Tropical Plant Care: Transitioning Your Tropical Treasures in Autumn
Discover the secrets of successful Fall Tropical Plant Care. Learn how to transition your exotic plants for a thriving winter indoors.
Eucalyptus Growing Indoors: Tips and Troubleshooting Guide
Discover the art of eucalyptus growing indoors for year-round beauty and fragrant cut foliage in your flower arrangements.
When to use Fluval Stratum for Houseplants
Discover the perfect timing to use Fluval Stratum for houseplants and unlock vibrant growth in your indoor oasis. Learn more here.
How To Grow Bay Leaves Indoors
Discover the secrets of successful gardening with our guide on how to grow bay leaves indoors. Cultivate your own aromatic herb garden!
Easy Exotic Houseplants: Tropicals That Thrive Indoors in Containers
Tropical plants are the most beautiful, easy to grow indoor houseplants. Start growing exotic houseplants today that fruit and flower!
Brighten Up The Dull Days Of Winter With Blooms
Discover vibrant winter blooming houseplants that brighten your home with color and fragrance during the colder months.
Tips For Making A Moth Orchid Last From Costa Farms
Successful orchid care is pretty easy once you understand the seven basic steps the plant needs to thrive in your home environment.
Meet The Exotic Pitcher Plants - Sarraceniaceae, Nepenthaceae And Cephalotaceae
Learn about the exotic pitcher plants known as Sarraceniaceae, Nepenthaceae And Cephalotaceae including how to propagate them.
How To Grow Marimo Moss Balls
Learn how to grow Marimo Moss Balls and how to care for a moss ball to keep it happy. A Luffy ball is a very low maintenance plant.
Tropical Gardening: The Irresistible Allure & Addictive Power
Unveil the Addictive Allure of Tropical Gardening – From Starter Plants to Care Tips. Dive into #TropicalGardening!
Variegated And Other Interesting Plants: Elevate Your Space with Nature's Painted Wonders
Explore the world of variegated and unique plants, adding vibrant beauty and intrigue to your indoor oasis.
Tropical Plants For Medium To High Light
Check out these awesome tropcial plants for medium to high light that make wonderful, easy to care for houseplants.
How To Grow Tropical Plants
Growing tropical plants - also known as houseplants - indoors is fun and enjoyable plus many of them clean the indoor of pollutants.
It is easy to grow exotic looking plants that produce tropical fruit and colorful flowers in a pot in your living room or office.
Many of these plants are easy to start from seed and I share with you five plants that I recommend for indoor growing.
I also share with you why growing your own tropical fruit saves money.
In this video you will learn:
How to bring tropical plants indoors at the end of summer
How to grow tropical plants indoors
How to protect and overwinter tropical plants outdoors in cold climates
How to propagate tropical plants
How to water tropcial plants
How to grow topical plants in a greenhouse

