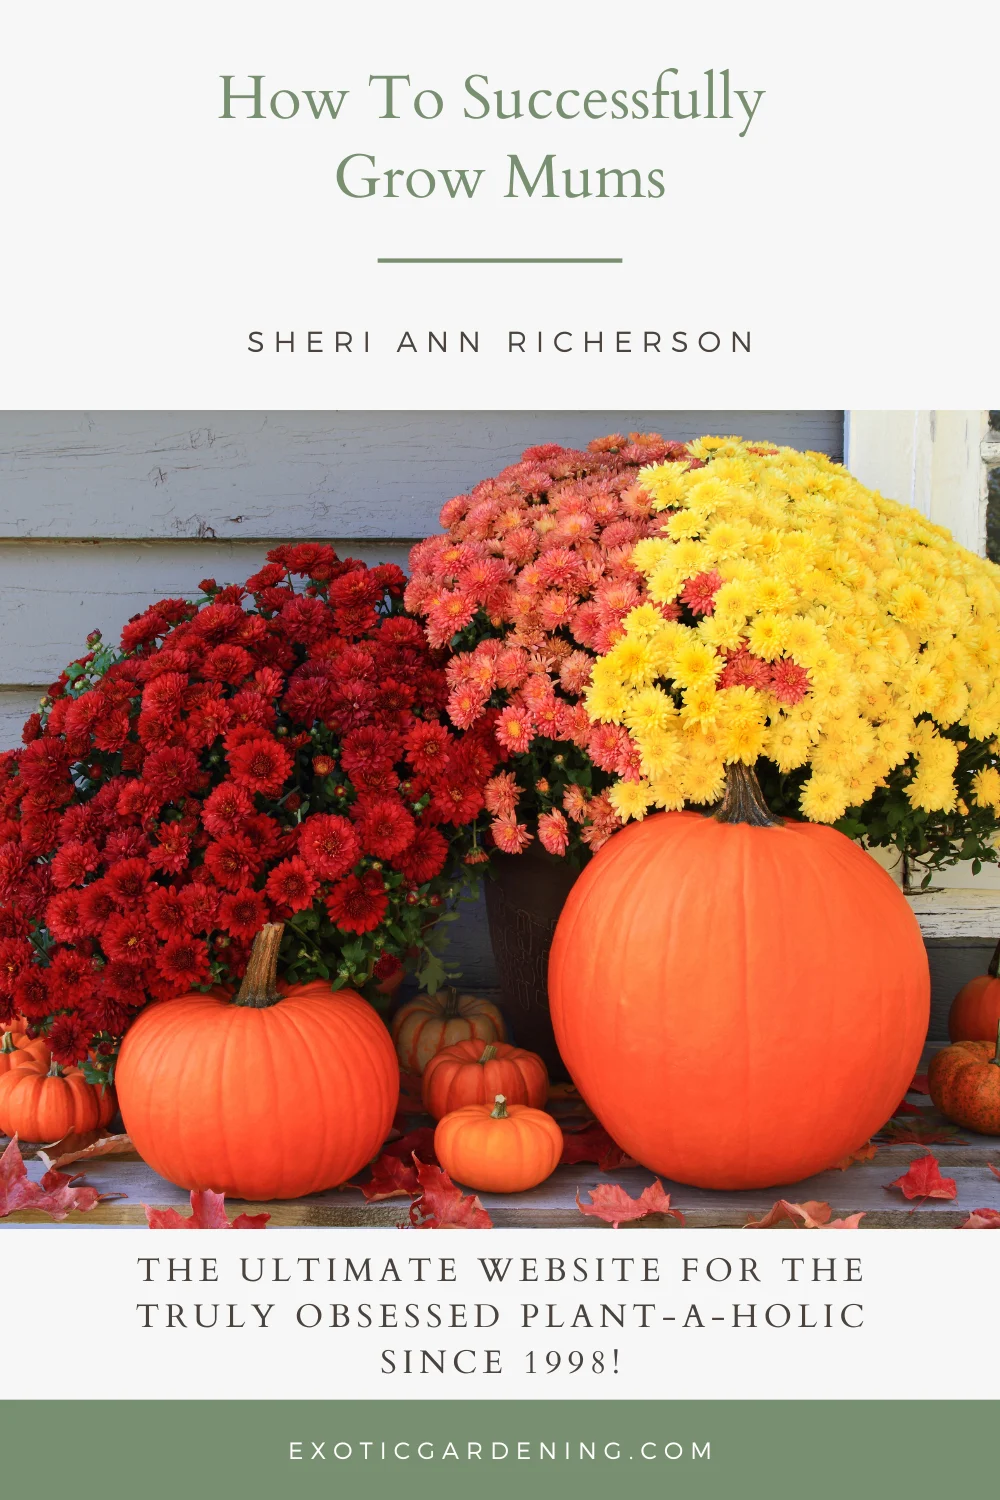
Chrysanthemums, commonly called mums, are certainly the star of the fall garden, and learning how to grow mums is one of the simplest ways to guarantee vibrant color and beauty right up until frost.
These cheerful flowers are available in a wide range of colors and forms - everything from tight, cushion-like blooms to elegant daisy-shaped blossoms - making it easy to match your garden style.
While many people treat mums as a seasonal purchase to decorate porches or entryways, the truth is that with a little care, many varieties will come back year after year.
To succeed, you’ll want to choose hardy garden mums, plant them in full sun with well-drained soil, and keep them watered consistently.
Mulching and proper fall planting times also make a big difference in helping mums survive the winter.
Once you know these basics, you’ll find that mums aren’t just fall décor - they’re reliable perennials that reward you season after season.


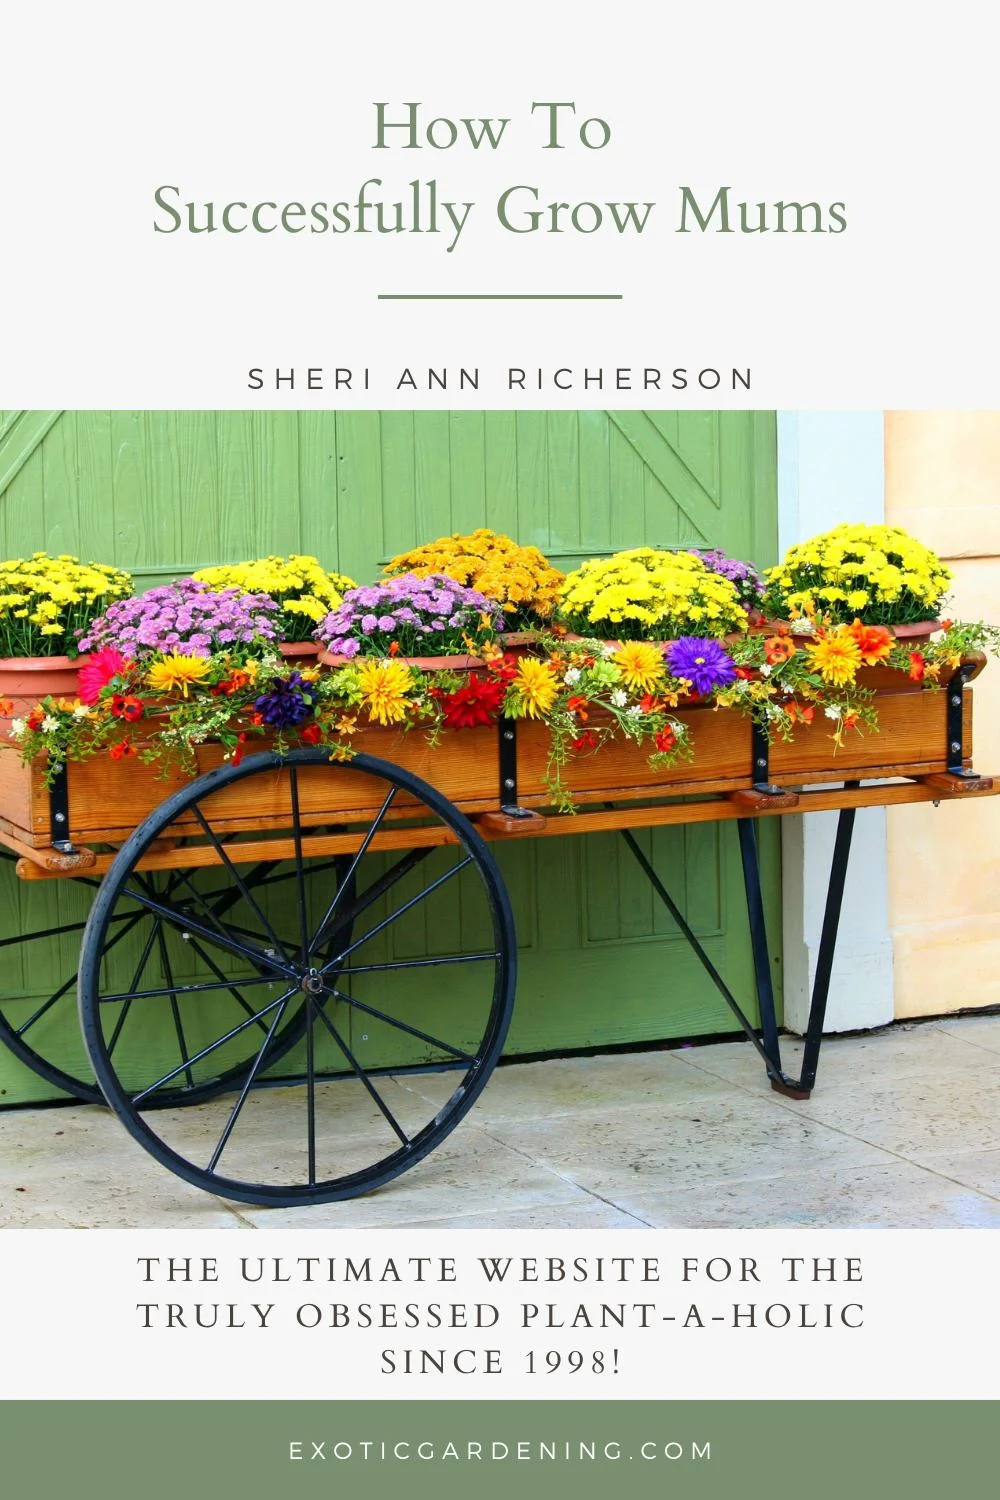
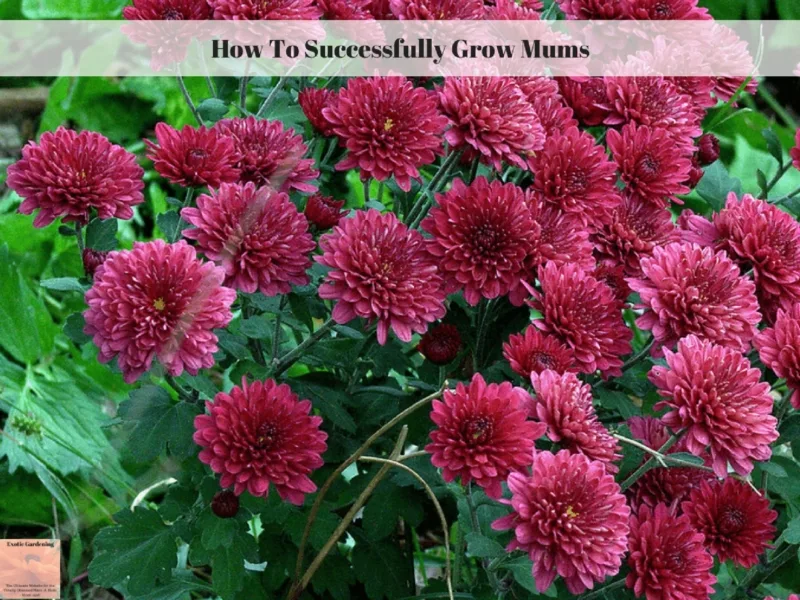
Grow Mums With Many Colors And Blossom Styles!
Mums are one of the most reliable fall blooming flowers.
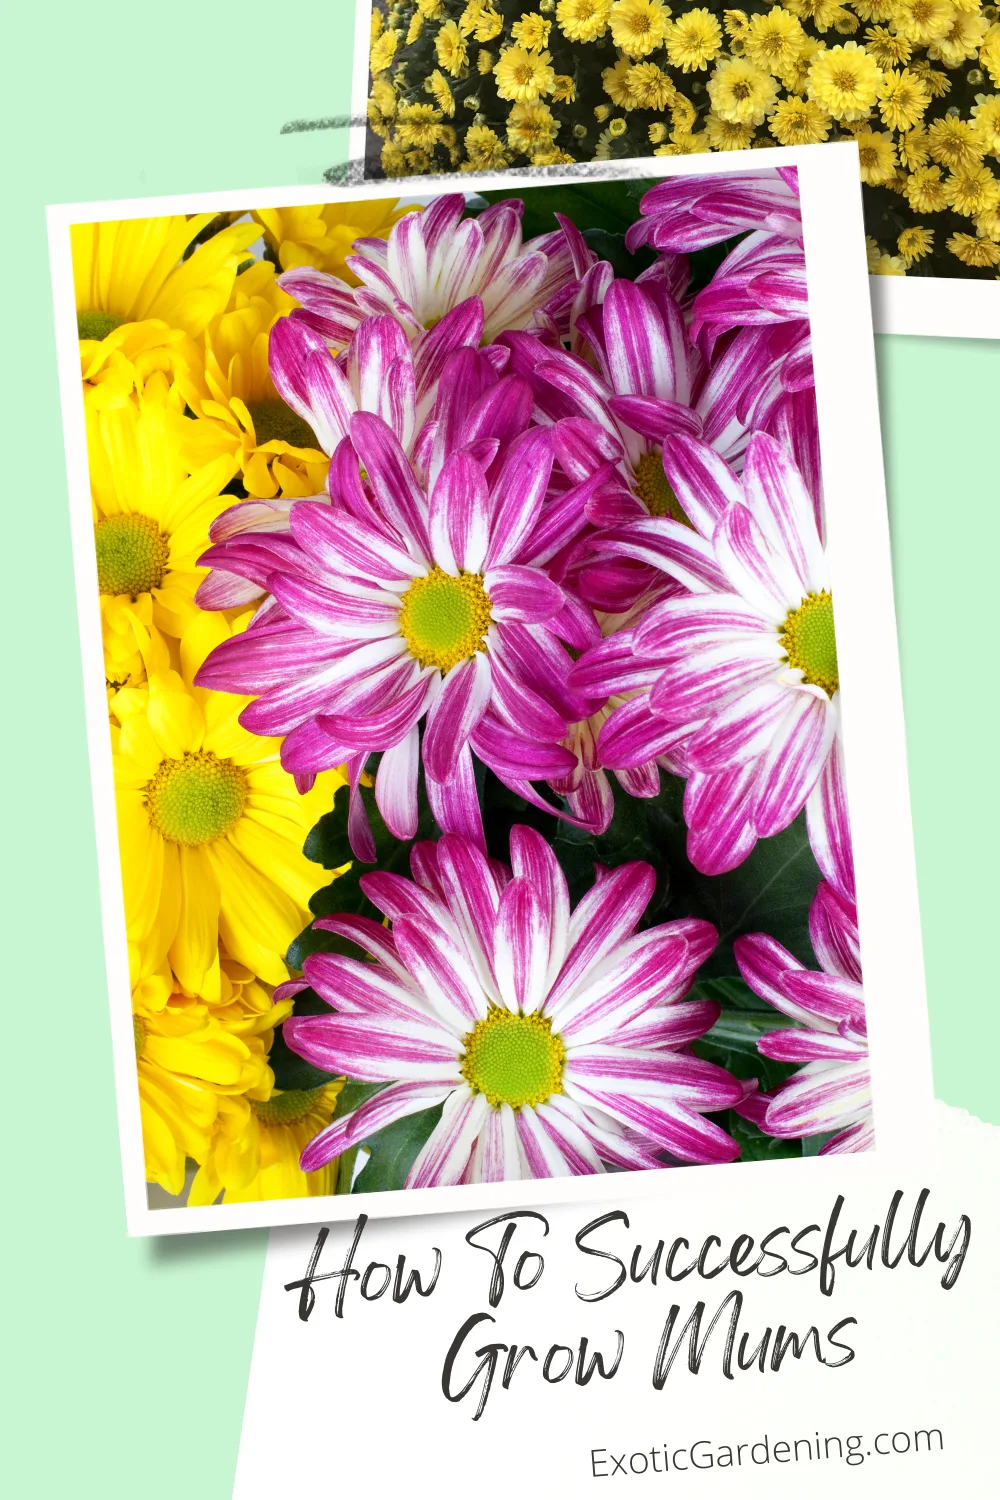
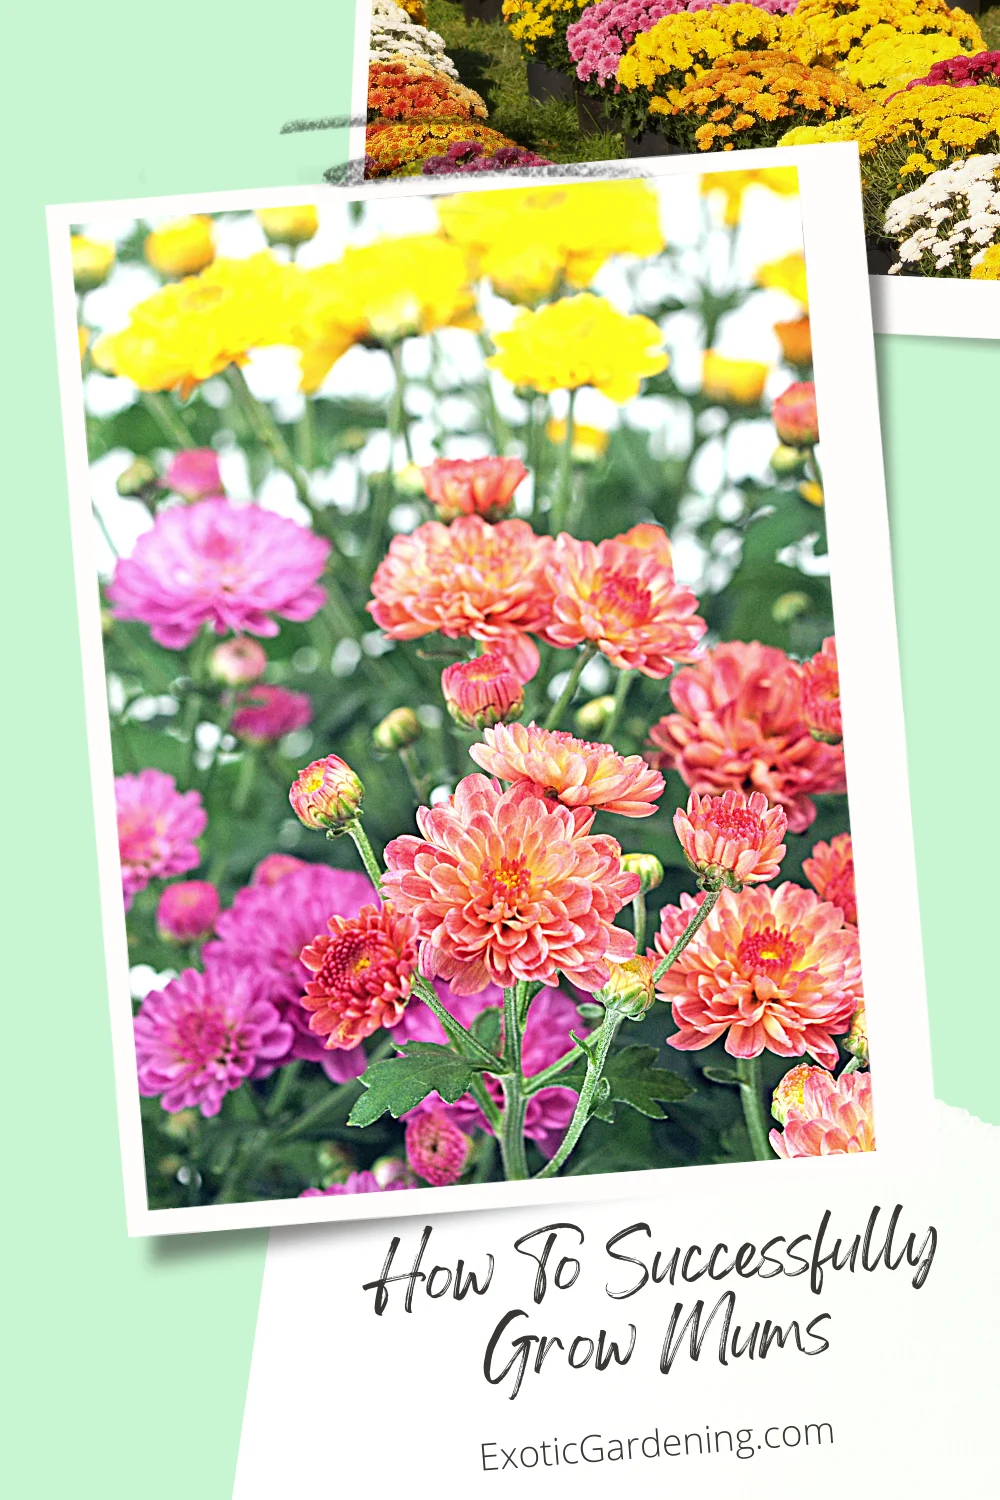
They come in a wide array of colors and blossom styles - so you can choose ones that are extravagant or dainty depending on your personal preference.
While it is true, not all mums are perennials - which are plants that come back year after year from their own roots - many are.
This means you can plant them in the garden immediately upon bringing them home or keep them in pots until the blooms begin to fade, then plant them in your garden.
What makes mums so beloved is their versatility.
Whether you prefer warm autumn shades like bronze, orange, and red, or cooler tones such as lavender and white, there’s a mum that can brighten your fall garden beds or front porch displays.
Some gardeners even coordinate different bloom times so that color flows seamlessly from early September through the first hard frost.
Another wonderful thing about mums is how quickly they can transform a space.
A few potted mums on the porch or along a walkway instantly create that cozy, seasonal feel, and when planted in clusters in the garden, they deliver a showy burst of color just when most summer flowers are fading.
Even beginners find them easy to grow, and because they’re generally pest-resistant and low maintenance, mums reward you with weeks of blooms for very little effort.
If you’ve been searching for a dependable fall flower that combines beauty, hardiness, and choice, mums are truly unmatched.
Add them to your seasonal displays or garden beds, and you’ll quickly understand why they’ve been the go-to flower for autumn gardeners for generations.


Mums Are Easy To Care For
Mums are pretty care-free in comparison to other plants.
They are generally pest-free and disease-resistant.
Cold weather does not bother them, in fact it intensifies the color.
A hard, killing frost however sends them into dormancy.
Choose early, mid-season and late blooming varieties so you get a full seven weeks of bloom!
Now, if you’re new to growing mums, here’s a simple step-by-step guide to help you feel confident:
-
Start with the right spot. Mums love the sun. The more sunshine you can give them - at least six hours a day - the better they’ll bloom. If they’re in shade, you’ll still get flowers, but not nearly as many.
-
Pay attention to soil and drainage. These beauties like rich, well-drained soil. A little compost mixed in when you plant goes a long way. If your soil tends to stay soggy, raise the bed up a bit or use containers to keep their roots happy.
-
Water regularly, but not too much. Because mums have shallow roots, they dry out faster than some other plants. Keep the soil evenly moist - especially when they’re budding and blooming. If they’re in pots, you may need to check them daily.
-
Let the weather work for you. Cooler temperatures bring out the best in mums. Don’t panic if it dips into the 40s or even a light frost comes along. That’s when the colors really start to pop. Just know a hard freeze will signal dormancy.
-
Give them a little TLC as blooms fade. Snip off spent flowers, and you’ll often encourage more buds to open. It also keeps the plants looking neat and tidy.
With just these basics, even first-time growers will see how easy it is to keep mums thriving.
They truly reward a little effort with weeks of fall color and cheer.

Site Selection To Grow Mums
Choose an area in full sun.
Mums that receive less than six hours of full sun will bloom, but not as robustly as those in full sun.
When it comes to site selection, think about both the practical and the pretty.
Mums are happiest in spots where they’ll soak up the morning sun and stay bright all afternoon.
A well-drained bed is ideal, but don’t be afraid to tuck them into containers or even spruce up existing borders with a splash of fall color.
Their cheerful blooms pair beautifully with ornamental kale, pansies, asters, or even a few strategically placed pumpkins.
If you’re planting in the ground, start by loosening the soil about 12 inches deep and mixing in compost or aged manure.
This not only enriches the soil but also helps it drain better, which is important because mums dislike soggy roots.
For those of us who garden in clay-heavy soil, adding sand or organic matter goes a long way in giving mums the environment they need to thrive.
Another tip is to think about air circulation.
While mums are generally disease-resistant, good spacing ensures healthy growth and prevents overcrowding, especially if you want them to return year after year.
Whether you’re filling a brand-new bed or refreshing a tired border, mums adapt quickly and can transform even the dullest corner into a lively, colorful display.
With a little planning, you’ll set the stage for mums that not only bloom brilliantly this season but also come back stronger next year.

Planting Tips For Growing Mums
Plant mums in well-drained soil to keep the roots from rotting.
Enrich the soil with compost for best results.
While it is true that mums can thrive in just about any type of soil, following these tips ensures success, and helps your mums survive from year to year.
When you’re preparing a spot for mums, start by loosening the soil at least 12 inches deep.
Mix in several inches of compost, leaf mold, or well-aged manure.
This not only feeds the plant but also improves drainage and soil structure, which is especially important if you’re working with heavy clay or sandy soil.
For containers, choose a high-quality potting mix specifically for container gardening and avoid using plain garden soil or top soil, which tends to compact and stay too wet.
Once you’ve placed the mum in the ground, make sure the crown (where the stems meet the roots) sits level with the soil surface.
Never plant a mum deeper than it is in the pot.
Gently firm the soil around the roots and give your new planting a thorough watering to help eliminate air pockets.
A great trick is to actually fill the planting hole with water, let it drain, and then set your mum in - this ensures moisture reaches the root zone right from the start and also confirms that the area you chose to plant your mum has good drainage.
If the water just sits in the hole and doesn't drain quickly, the chosen area needs amended more or it might be best to choose another area to plant your mum.
Deep watering means soaking the soil slowly so water sinks 6 to 8 inches down, instead of just sprinkling the surface.
This encourages stronger, deeper roots and helps mums stand up better to dry spells.
Watering deeply right after planting also helps them settle in faster.
Finally, add a 2–3 inch layer of mulch around the base of the plant, keeping it a couple inches back from the crown.
Mulch helps the soil retain moisture, prevents weeds, and gives shallow mum roots extra protection as they grow.
These small steps - amending soil, watering properly, and mulching - make a big difference in whether your mums thrive for just one season or return year after year.

Watering Mums
Water mums on a regular basis so the root system does not dry out.
This is especially important during dry spells and in the fall when the plants are storing up energy for winter survival.
Using a bit of mulch - even on the top of potted mums - helps keep the roots cool and the soil moist longer.
When it comes to watering, mums prefer consistency over extremes.
Instead of quick daily sprinkles, focus on deep watering - soaking the soil slowly until moisture penetrates 6 to 8 inches into the root zone.
This encourages stronger roots that can handle both summer heat and winter cold.
If you’re planting in the ground, water at the base of the plant to keep foliage dry and reduce the risk of disease.
For potted mums, water until you see it begin to drain from the bottom, ensuring the entire root ball is moist.
Watering frequency depends a lot on temperature.
In cooler fall weather (50s–60s °F during the day), mums may only need water two to three times a week.
But in warmer spells (70s–80s °F), check them daily - potted mums especially can dry out fast and may need water every day.
During very hot weather (85 °F and up), be prepared to water in the morning and again lightly in the evening if the soil feels dry, but try to water at ground level so the leaves stay dry during the night.
A good rule of thumb is to stick your finger about two inches into the soil; if it feels dry, it’s time to water.
With the right balance of deep, regular watering and a layer of mulch to lock in moisture, mums remain healthy, vibrant, and better prepared to survive through the seasons.


Summer Care For Mums
Once your mums begin to emerge in spring you need to start pinching them back to encourage them to branch.
This is why the ones you buy at the store look so full.
As soon as my mums get three sets of leaves on each stem, I pinch the top set off.
I continue doing this every two weeks until mid-July and then I let them finish growing on their own so they bloom on time.

Pinching may sound intimidating, but it’s really just using your thumb and forefinger - or a pair of small pruners - to remove the tender tip of each stem.
This little snip signals the plant to send out more side shoots, which leads to bushier growth and more flowers in the fall.
Without pinching, mums can get tall and leggy, often flopping over once heavy with blooms.
During the summer, it’s also a good idea to fertilize mums every 4 to 6 weeks with a balanced fertilizer, stopping by mid-July so you don’t encourage soft growth that delays blooming.
Keep them evenly watered, especially in hot weather, since stress from dry soil can cause buds to form unevenly.
Container-grown mums may need water every day during heat spells.
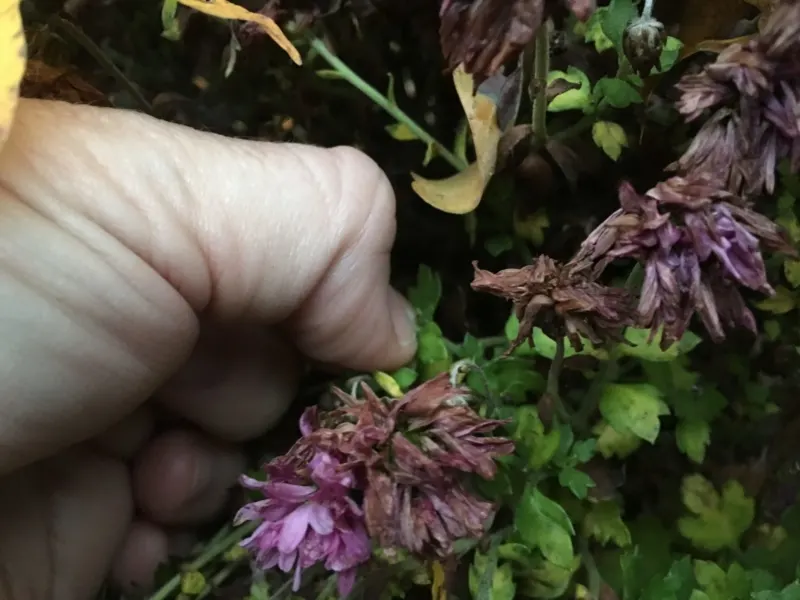
There is no need to do this to mums you purchase in the fall – however pinching off the faded flowers can encourage some varieties to re-bloom.
Removing spent flowers is known as deadheading.
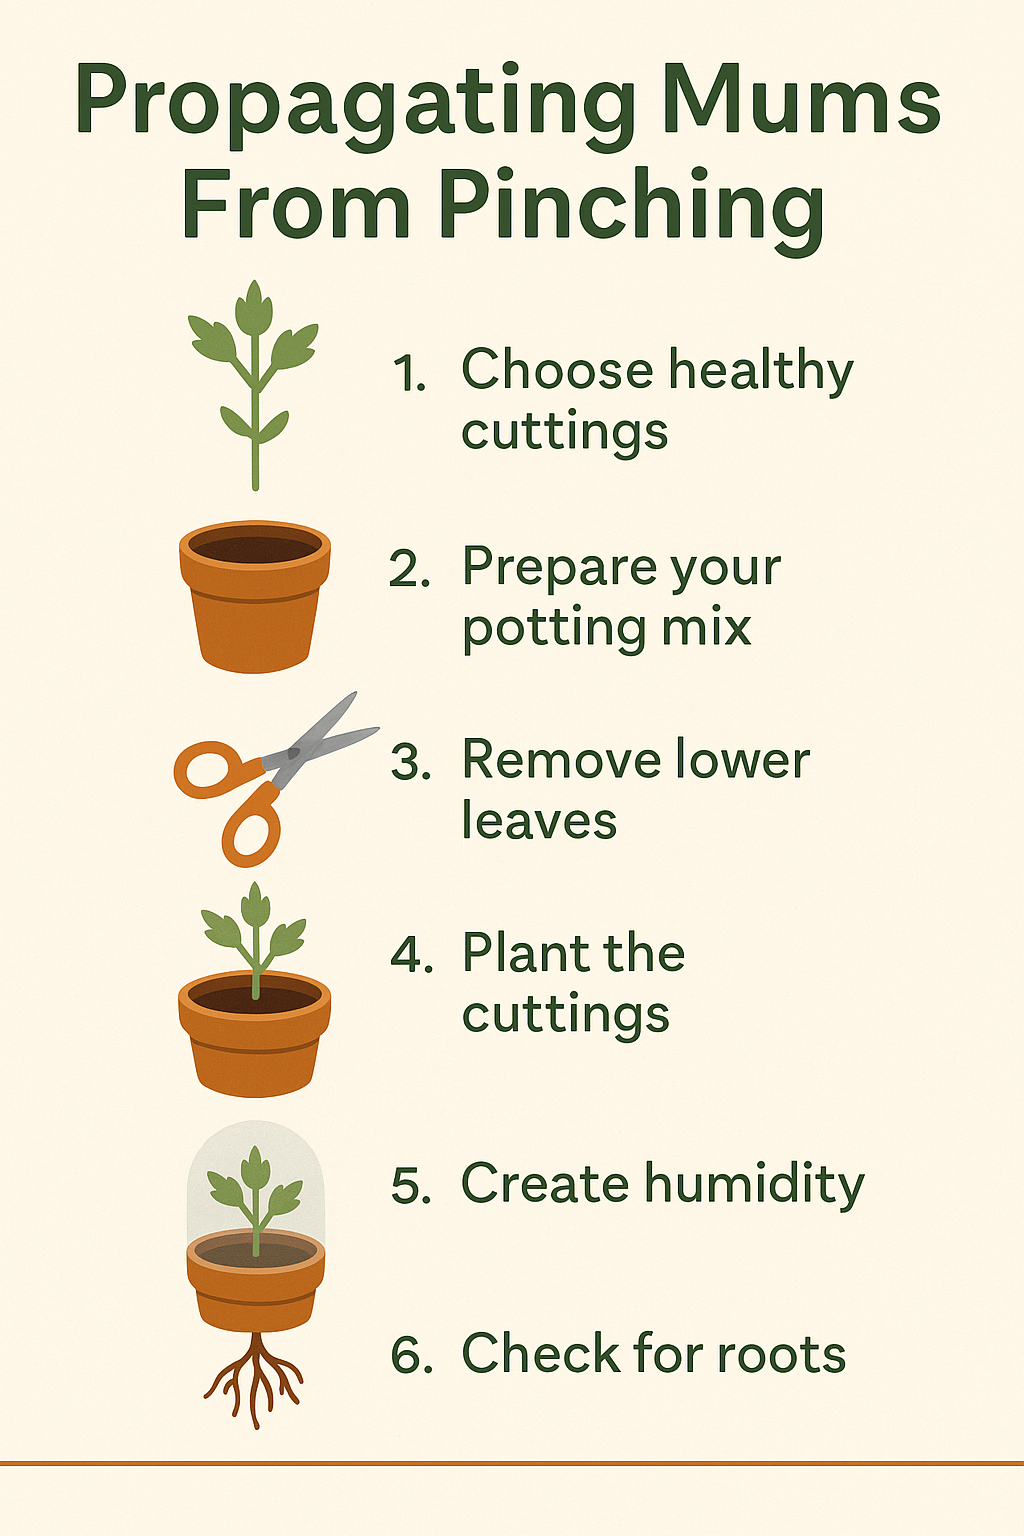
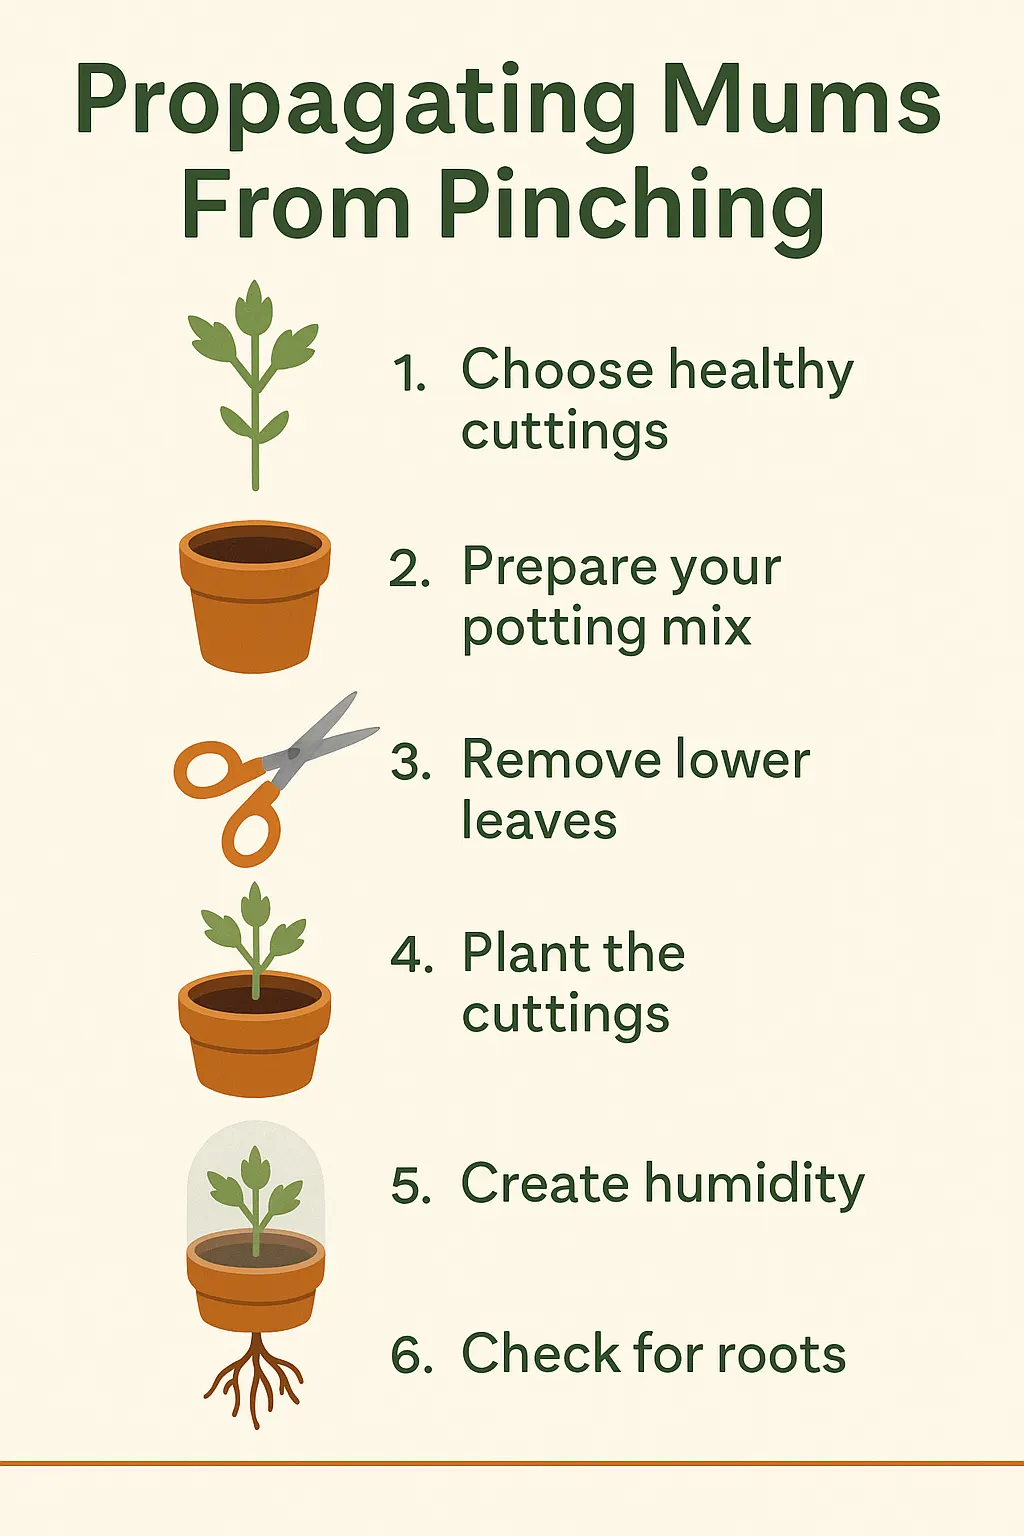
Propagating Mums From Pinching
Did you know those little tips you pinch off your mums in summer can actually grow into brand-new plants?
Instead of tossing them on the compost pile, you can root them and expand your collection for free.
Propagating mums from cuttings is easy, even for beginners, and it’s a fun way to multiply your favorite varieties.
Here’s how to do it step by step:
-
Choose healthy cuttings. When you pinch your mums back, select tips that are 2–3 inches long with at least two sets of healthy leaves. Avoid any stems that look weak, diseased, or woody.
-
Prepare your potting mix. A light, well-draining mix works best. You can use seed-starting mix, perlite mixed with peat, or even a blend of sand and compost. Fill a small pot or tray and water lightly so the soil is damp but not soggy.
-
Remove lower leaves. Snip off the bottom set of leaves so you have a bare stem to insert into the soil. Leave one or two sets of leaves at the top to keep the cutting alive.
-
Plant the cuttings. Poke a small hole in the soil with a pencil, then insert the cutting so that at least one bare node (where you removed the leaves) is under the soil surface. Gently firm the soil around it.
-
Create humidity. Place a clear plastic bag, dome, or even a recycled milk jug over the pot to keep moisture in. Set it in bright, indirect light, not direct sun, which can scorch the cuttings.
-
Check for roots. In about 2 to 3 weeks, gently tug on a cutting. If you feel resistance, roots have formed. At this point, you can gradually remove the cover and treat them like young plants.
By late summer, your cuttings will be sturdy enough to pot up individually or plant directly into the garden.
With this simple method, one mum can turn into many, giving you plenty of free plants to enjoy.

Winter Care For Mums
Mums have a shallow root system, and thus often heave when the ground freezes, then thaws.
This is the reason many mums do not survive winter.
The good news is, with a little extra effort in the fall, you can give your mums a much better chance of coming back strong in the spring.
Once the ground begins to freeze, go ahead and mulch them well.
A good 3 to 4 inches of straw, shredded leaves, pine needles, or even bark mulch helps insulate the soil and keeps the temperature more stable.
That stability is what prevents the constant freezing and thawing that pushes mums up out of the ground.
All winter long, check on your mums now and then.
If you notice one has heaved and exposed its roots, gently press it back down and cover the crown with soil before adding more mulch.
In very cold areas, I like to toss on some evergreen boughs after mulching.
They’re light, airy, and let just enough air circulate while still protecting the crown from drying winds and bitter cold.
For those growing mums in pots, don’t leave them out unprotected.
Once the blooms fade and the weather turns, you can overwinter pots in an unheated garage, shed, or even a cool basement.
The idea is to keep them cold but not exposed to the worst of winter’s freeze-thaw cycles.
Water sparingly just enough to keep the soil from becoming bone dry.
And for anyone who doesn’t want to fuss with heavy mulching, choose early-blooming hardy varieties.
They’re naturally a bit tougher and often come back with less work.
With the right preparation, your mums won’t just be a one-season wonder, they’ll reward you year after year.

Dividing Mums
It is best to divide mums in the spring when they begin to emerge.
Dig the plant up, divide the rootball into two to three sections making sure to remove any dead plant material in the center of the root ball and re-plant each section.
Be sure to water them well so the roots begin to grow into the surrounding soil.
If you’ve never divided mums before, don’t worry, it’s much easier than it sounds, and it’s one of the best ways to keep your plants healthy and blooming year after year.
Here’s a simple, step-by-step guide:
-
Wait for spring growth. Once you see fresh green shoots poking up, it’s the perfect time to divide. The plant is waking up and ready to root into new soil.
-
Dig carefully. Using a garden fork or shovel, dig in a wide circle around the plant to lift the entire root ball. Try not to slice through the crown - you want each section to have plenty of shoots and roots.
-
Split the plant. With your hands or a sharp knife, gently pull the root ball apart into two or three sections. Don’t be alarmed if you see brown, woody centers - that’s old growth. Remove it so only healthy roots and shoots remain.
-
Replant immediately. Place each section into a prepared hole or pot at the same depth it was growing before. Fill in with soil, gently firm it down, and water deeply to settle the roots.
-
Mulch and care. Add a thin layer of mulch to help hold moisture, then water regularly until the plants are well established.
Dividing not only gives you more mums for your garden, it also rejuvenates older plants that might have become thin or straggly in the center.

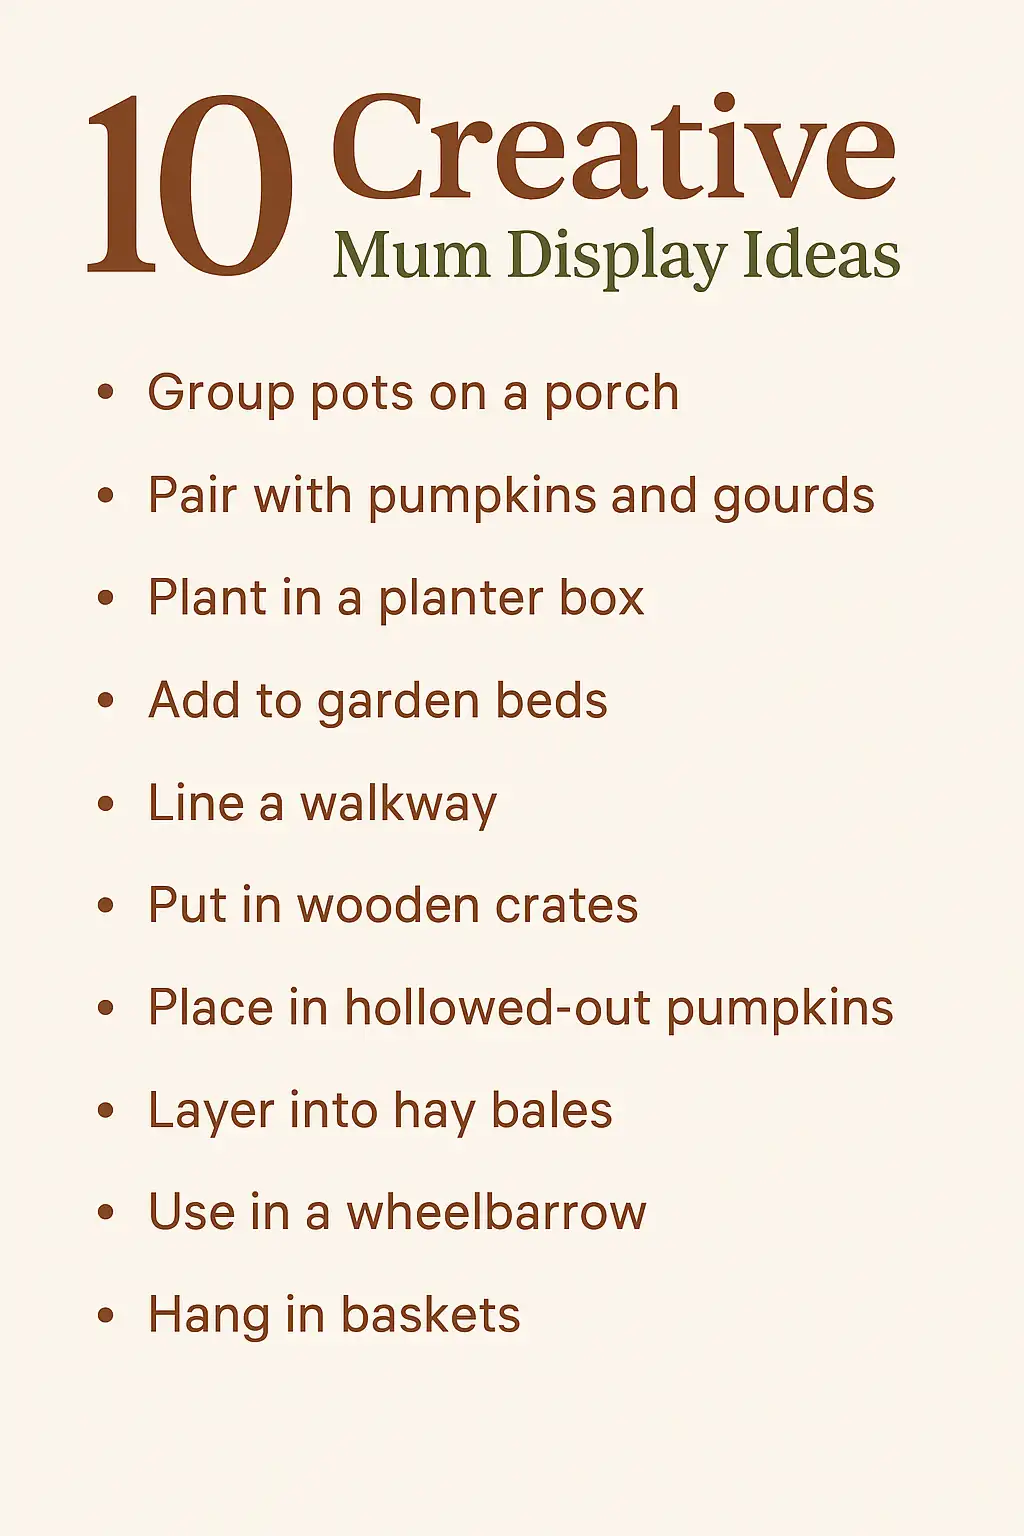
Creative Ways to Display Mums
By now, you know how easy it is to grow and care for mums, but the real fun comes when you start thinking about how to display them.
Mums bring so much cheer to the fall garden, and with a little creativity, you can turn them into stunning seasonal showpieces.
One of the simplest yet most striking ideas is to cluster pots of mums in different colors together on your porch or patio.
Mixing orange, burgundy, yellow, and white creates an instant harvest vibe.
You can tuck pumpkins, gourds, or even a basket of apples between the pots for a farm-fresh look.
For a softer, cottage-style display, pair pastel mums with ornamental kale and dusty miller in a long planter box, perfect for window sills or railing accents.
If you have garden beds that start looking tired by mid-September, refresh them by planting mums right in among your existing perennials.
They blend beautifully with ornamental grasses, asters, and sedums, filling gaps with bold color.
Mums also look gorgeous massed together in a single sweep along a walkway, framing a garden gate, or circling a mailbox.
For a unique twist, try placing potted mums inside hollowed-out pumpkins or rustic wooden crates lined with burlap.
These displays are showstoppers at fall gatherings and can be moved around easily.
Another favorite idea is to layer mums into hay bales or old wheelbarrows for a playful, farmhouse feel.
Don’t forget vertical displays!
Hanging baskets of mums make unexpected pops of color, especially when paired with trailing ivy or sweet potato vine.
Even a simple tiered plant stand filled with mums in varying shades can transform a plain corner into a fall focal point.
No matter your style - whether you lean rustic, cottage, or modern - mums can adapt to it.
They’re versatile, forgiving, and always ready to put on a show.
With just a few thoughtful arrangements, you can celebrate the season in a way that feels completely your own.


Frequently Asked Questions About Growing Mums
Q: Are chrysanthemums (mums) perennials or annuals?
A: Many mums are perennials, but not all. Hardy garden mums can return year after year with proper planting and winter care, while florist mums are often treated as annuals.
Q: When is the best time to plant mums?
A: Spring or early summer is best because it allows roots to establish before winter. Fall mums can be planted too, but they may not survive harsh winters.
Q: How much sun do mums need?
A: At least six hours of full sun daily. Less light means weaker, leggier growth and fewer blooms.
Q: What soil do mums prefer?
A: Well-drained, compost-amended soil. Heavy clay should be loosened or raised beds used to prevent root rot.
Q: How often should I water mums?
A: Keep soil evenly moist. Potted mums dry out quickly and often need daily watering, while in-ground mums usually need water 2–3 times weekly.
Q: Do mums need fertilizer?
A: Yes, feed every 4 to 6 weeks in spring and summer with a balanced fertilizer. Stop feeding in late summer to avoid soft growth before frost.
Q: What is pinching, and why is it important?
A: Pinching is removing the top set of leaves to encourage branching. Do this every 2 to 3 weeks until mid-July for fuller plants and more flowers.
Q: How long do mums bloom?
A: Most bloom for 4 to 8 weeks, depending on variety. Plant early, mid-season, and late bloomers to extend the display.
Q: How can I help mums survive winter?
A: Mulch heavily after the ground freezes, water them well in fall, and consider covering with evergreen boughs to prevent frost heave.
Q: Can mums grow from seed or cuttings?
A: Yes, but mums from seed vary in appearance. For consistent results, divide established plants or root cuttings in spring.
Q: Why are my mums floppy or bare at the base?
A: Usually because they weren’t pinched back in summer, or they’ve become overcrowded. Divide in spring and pinch consistently for bushier growth.
Perennial Plants


Awesome Colorful Plant Combinations: Reliable Daylily And Geranium
If you're looking for a colorful, easy to care for perennial plant combination, try the daylily and geranium.


Long Season Garden Plants
Long Season Garden Plants


How To Grow Mallows
Learn how to grow mallows, a Malvaceae family which includes some of the most popular plants for the home garden, Hibiscus.


Popular Plants For Miniature Gardens
There are a number of popular miniature plants that are ideal to use to create miniature gardens inside or outside your home or office.
Sweet Autumn Clematis: A Garden Treasure
Discover the enchantment of Sweet Autumn Clematis: rapid growth, fragrant blooms, and versatile garden beauty await!